

Showing posts with label project. Show all posts
Showing posts with label project. Show all posts
Thursday, February 4, 2010
The Urban Baby Blanket Revisited
I was due for a good crafty project and this fit the bill perfectly. I love making baby blankets! I can't help it. Just strolling through the fabric store, there are so many great prints and textures that would make gorgeous blankets that make a statement. Now, don't get me wrong, I love sweet little prints and polka dots just as much as the next crafty mama ... but I like to do things my own way. This time I found a nice big floral print and paired it with a lightweight denim. I cut flowers from the extra fabric and appliqued the 'stack' to dress up the plain denim. Gorgeous! I love shaking it up a little, don't you?


Wednesday, January 20, 2010
Loving Shape Collage!
Alright, I admittedly spent too much time in front of the computer today, but I needed a creative diversion before heading back to JetBlue for another 8 hour session of training. Blech. Now, I'm running on very little energy and even less sleep so my new toy offered the most fun with the least effort.


Tuesday, January 19, 2010
New Toy, New Toy! I Have a New Toy!
Photojojo absolutely rocks! I love getting their newsletter with fun how-to projects and photo tips. They are always a treat and today was no exception. Today they introduced me to Shape Collage, a magically fantastical program that will takeyour own personal collection of photos and arrange them into a glorious collage in the shape of your choosing. I've only had limited time to play in it this afternoon, but it is soooo much fun! Make a custom image for your sweetheart, parents, grandparents, sister, boss, etc.
The first image I sampled was a double heart I found online. The pictures aren't the best, I just grabbed the first album I saw ... Izzy, and named it Puppy Love. (oh the cheese factor!) I love the shape though and will definitely make another with a better grouping of photos. This one only took about a minute to create and has 125 photos in it. Not bad. Then I did one with a red velvet background just to see how the program would output it. Yuck, but this was my bad. The fabric photo is too detailed, too close up. It overpowers the photos and makes them look too flat. A field of grass way off in the distance or a nice patch of blue sky would've looked much better. This one took about ten minutes to create.
 The last test for today was a doozy. I'll be the first to admit that under some circumstances I just love to push the limits as far as I can, so I through over 600 images into this one from different family activities over the last 3 years. I wanted to see how the program handled a really detailed, full 'shape' and had a great brainstorm of making a photo family tree. This beauty took a little over an hour to create ... and I'm wishing I'd bought the upgrade so I could edit it and push a few things around in PhotoShop ... maybe after payday. It's also the only way to get rid of the watermark.
 Next time around I want to try some custom text ... oh, the possibilities. Go download it yourself and have a blast! So many ideas brewing ...
The first image I sampled was a double heart I found online. The pictures aren't the best, I just grabbed the first album I saw ... Izzy, and named it Puppy Love. (oh the cheese factor!) I love the shape though and will definitely make another with a better grouping of photos. This one only took about a minute to create and has 125 photos in it. Not bad.
 Then I did one with a red velvet background just to see how the program would output it. Yuck, but this was my bad. The fabric photo is too detailed, too close up. It overpowers the photos and makes them look too flat. A field of grass way off in the distance or a nice patch of blue sky would've looked much better. This one took about ten minutes to create.
 The last test for today was a doozy. I'll be the first to admit that under some circumstances I just love to push the limits as far as I can, so I through over 600 images into this one from different family activities over the last 3 years. I wanted to see how the program handled a really detailed, full 'shape' and had a great brainstorm of making a photo family tree. This beauty took a little over an hour to create ... and I'm wishing I'd bought the upgrade so I could edit it and push a few things around in PhotoShop ... maybe after payday. It's also the only way to get rid of the watermark.Next time around I want to try some custom text ... oh, the possibilities. Go download it yourself and have a blast! So many ideas brewing ...
Thursday, January 14, 2010
Week in Review 1/14/10
So, somehow the week came and went and you haven't heard very much from me. You should know that I think about writing here all the time ... it's just hard to find the time to 'get her done' some days. Things here are busy as always, but things are getting done and there are new projects in motion which is always fun. We have #4 in an after-school art program for the next six weeks. He's chosen the drawing/painting class ... and #1 is a high school volunteer for the program helping in his classroom. Since they've never been in the same school together this is a treat for both of them. I attended my very first Geography Bee that #4 was a contestant in, very exciting. (I would have failed miserably) I've drilled over 100 night lights that need to be cut. We're still on track for eating healthy. (New recipes coming soon) My toes are painted and my leg is healing from a classic Lisa moment in the icy school parking lot ... and Izzy is cuter than ever!
Oh! And get this! We've received a formal invitation by mail to attend the Love You Dinner at hubby's parents' house in February. They are the sweetest people I know. What a great idea. I'll have to log that one in for future dinner dates with the kidlets after they move out. It was such a treat just to get the invitation in the mail and it almost made me cry when I read it. Pass this one on and host a Love You Dinner for your family members too. I'll try to be better about posting next week. I'm shifting jobs at JetBlue for a smidge and will train in the evenings all next week so my days will be free! Yay!
 We have #4 in an after-school art program for the next six weeks. He's chosen the drawing/painting class ... and #1 is a high school volunteer for the program helping in his classroom. Since they've never been in the same school together this is a treat for both of them. I attended my very first Geography Bee that #4 was a contestant in, very exciting. (I would have failed miserably) I've drilled over 100 night lights that need to be cut. We're still on track for eating healthy. (New recipes coming soon) My toes are painted and my leg is healing from a classic Lisa moment in the icy school parking lot ... and Izzy is cuter than ever!
Oh! And get this! We've received a formal invitation by mail to attend the Love You Dinner at hubby's parents' house in February. They are the sweetest people I know. What a great idea. I'll have to log that one in for future dinner dates with the kidlets after they move out. It was such a treat just to get the invitation in the mail and it almost made me cry when I read it. Pass this one on and host a Love You Dinner for your family members too. I'll try to be better about posting next week. I'm shifting jobs at JetBlue for a smidge and will train in the evenings all next week so my days will be free! Yay!
Friday, December 11, 2009
Gift Tags for All
I promise I'm trying my best to keep the projects coming ... it's just been hard to find blocks of time that are 'mine'. I seem to get blindsided by the kids' schedules constantly, then there's dinner and dishes and trying to squeeze in any kind of quality time with hubby. Anywho! I've managed to grab onto a small window tonight and thought I'd finally make these since they've been on my to-do list for way too long.
I started by opening a business card template in my Pages program. I split the card in half with the page rulers and set up a simple graphic image and a text box. I grouped everything together and duplicated it to each space. Quick and easy. Then I made another with a word cloud from Wordle.
Print. Cut. Stack. Clip.
With me so far?
Now, we're going to use either white glue (Elmer's) or padding compound, if you have it. Brush on a generous coat and leave it to dry for about half an hour. Use a heavy-duty hole punch to punch through the stack. If you don't have one that is strong enough, then punch them before you glue them together.

 There are 20 tags in each nifty pad. These are so great to have on hand with your gift wrapping supplies. My next batch will need to wait until I get more ink for our printer, running a bit low these days.
I started by opening a business card template in my Pages program. I split the card in half with the page rulers and set up a simple graphic image and a text box. I grouped everything together and duplicated it to each space. Quick and easy.
 Then I made another with a word cloud from Wordle.
Print. Cut. Stack. Clip.
With me so far?
Now, we're going to use either white glue (Elmer's) or padding compound, if you have it. Brush on a generous coat and leave it to dry for about half an hour. Use a heavy-duty hole punch to punch through the stack. If you don't have one that is strong enough, then punch them before you glue them together.


 There are 20 tags in each nifty pad. These are so great to have on hand with your gift wrapping supplies. My next batch will need to wait until I get more ink for our printer, running a bit low these days.
Sunday, November 8, 2009
Trying to Recoup
 I know. Nothing interesting here lately. Sorry. I've been in training at JetBlue all last week from 7:30 pm to 1:30 am. This means I've been running on 4 hours of sleep a night 5 days in a row. Ick. Napping during the day has been useless; it's just not the same as getting a full night's sleep. I feel slightly more normal today, but start up again tomorrow. I have one week left. Bear with me. I do have a list of projects that keeps growing; gifts, tags, notebooks, baby blankets, cards ... there will be fun things here soon. I'm working on a shop update as well. Stay tuned.
Sunday, October 18, 2009
I Feel A Project Coming On ...
 Great vintage photos for a test project. I can't wait to get these printed up to try out my next project. This is another one geared toward family Christmas presents. I'll admit right upfront that this isn't my original idea ... but then, they rarely are. I love to see what other people are doing and then take it my own direction. This one is great if you have old photos from your own family that you can scan and have reprinted.
 Projects, projects ... I LOVE getting my hands on a new project!
Friday, October 9, 2009
Easy-Peasy and Soothing Too: Heat Pack Tutorial
There's nothing like the reality of getting older combined with new and exciting budget concerns to really get your muscles tied up in knots. I use these microwavable heat packs religiously all year long, but they are especially comforting in the colder months. If you already have one, you know the kind of relief I'm talking about. If you don't ... you're in for a real treat! I made three different heat packs to show you a variety. The actual process is very simple and they make a great gift for that hard-to-shop-for person on your Christmas list.
Materials:
1 new, washed hand towel
20" cotton or nylon webbing
Thread to match
2 1/2 cups rice
1) Cut your hand towel lengthwise so it measures 10" wide.
2) Cut webbing so you have 2 pieces 10" long.
3) Fold towel in half lengthwise, right sides together and pin easing in any difference in length. (the binding edge will be slightly shorter) Stitch twice at 2/8" for extra strength with minimal bulk. 4) Tuck one length of webbing to the inside of one of the openings, making sure there are no twists in it. Match up the ends of the webbing with the edge of the fabric. Pin and sew at 5/8" two times. Trim corners.
5) Turn right side out using a blunt chopstick to get the corners square. Now scoop 1/2 cup of rice into the tube and let it fall to the very bottom.
6) Lay the piece out and pin 5" from the bottom securing the rice inside. Stitch here to close the pocket of rice. Add another 1/2 cup of rice and pin 5" from the last segment. Sew. Repeat 3 more times. 7) When you reach the last section, turn the fabric inside about 1/2".
8) Tuck both ends of the last webbing piece into this section and pin securely.
9) Stitch twice very close to the edge and you're done! To use: Microwave for 90 seconds to start. Place on neck or back and let the moist heat work its magic. (These are great on your abdomen for cramps too.) If it's not hot enough, heat in 30 second intervals. 2 1/2 - 3 minutes is usually perfect for me, but every microwave is different. DO NOT scorch the rice or you'll never get the smell out. Store in a cool dry place away from food.
Alternate method: Follow steps 1-4 above. Then pin lengthwise 1 1/2" from each side of the tube and 1" from the open end. Stitch to make 3 separate tubes. Pour 3/4 cup of rice into each tube using a funnel. Shake the pack so the rice can fall all the way to the bottom. Once these are all filled, follow steps 7-9 above. Alternate Fabric: These area also great made from polar fleece. Just cut a rectangle measuring 10"x26". Follow all the steps, but make 4 sections 6" long instead.
 These striped towels from IKEA remind me of candy canes and would be so cute from Christmas. Stay tuned! I'll have another how-to with the remaining towel pieces shortly. Fun!
Materials:
1 new, washed hand towel
20" cotton or nylon webbing
Thread to match
2 1/2 cups rice
1) Cut your hand towel lengthwise so it measures 10" wide.
2) Cut webbing so you have 2 pieces 10" long.
3) Fold towel in half lengthwise, right sides together and pin easing in any difference in length. (the binding edge will be slightly shorter) Stitch twice at 2/8" for extra strength with minimal bulk.
 4) Tuck one length of webbing to the inside of one of the openings, making sure there are no twists in it. Match up the ends of the webbing with the edge of the fabric. Pin and sew at 5/8" two times. Trim corners.
5) Turn right side out using a blunt chopstick to get the corners square. Now scoop 1/2 cup of rice into the tube and let it fall to the very bottom.
6) Lay the piece out and pin 5" from the bottom securing the rice inside. Stitch here to close the pocket of rice. Add another 1/2 cup of rice and pin 5" from the last segment. Sew. Repeat 3 more times.
 7) When you reach the last section, turn the fabric inside about 1/2".
 8) Tuck both ends of the last webbing piece into this section and pin securely.
9) Stitch twice very close to the edge and you're done!
 To use: Microwave for 90 seconds to start. Place on neck or back and let the moist heat work its magic. (These are great on your abdomen for cramps too.) If it's not hot enough, heat in 30 second intervals. 2 1/2 - 3 minutes is usually perfect for me, but every microwave is different. DO NOT scorch the rice or you'll never get the smell out. Store in a cool dry place away from food.
 Alternate method: Follow steps 1-4 above. Then pin lengthwise 1 1/2" from each side of the tube and 1" from the open end. Stitch to make 3 separate tubes. Pour 3/4 cup of rice into each tube using a funnel. Shake the pack so the rice can fall all the way to the bottom. Once these are all filled, follow steps 7-9 above.
 Alternate Fabric: These area also great made from polar fleece. Just cut a rectangle measuring 10"x26". Follow all the steps, but make 4 sections 6" long instead.
 These striped towels from IKEA remind me of candy canes and would be so cute from Christmas. Stay tuned! I'll have another how-to with the remaining towel pieces shortly. Fun!
Wednesday, October 7, 2009
Loving Fall
 I am loving fall right now. I fight the urge to drive up into the canyon almost almost daily. The laundry/cooking/dishes won't allow it ... maybe Saturday. It's finally time to dig out all my sweaters and thick socks and boots. It's time to pull out the flannel sheets for the kids and buy apple cider. I love it! Cold mornings with frost on the grass and sunny afternoons with the most beautiful leaves!
 I have the beginnings of my Fall book started for Kara's class. Boy, I'm dragging my feet a little on this one. I need to put a lot more creative energy into these to pretty them up and give them more depth. I think I just needed more fall out in the 'hood'. Now maybe I can finish these up and move on to the next project in my head.
 I'll be working on them this weekend.
Tuesday, October 6, 2009
The Full Facelift: Before & After
 Here it is, folks. Just look at those bare walls. We've been in this house for just over two years now and still, not even one picture hung. In fact, my sweet girl had picture frames stashed all over the place ... half of them filled with prints and the rest with the original display pictures still in them. It was time, time to make it look like she actually LIVES in this room, this very bright green room.
 Where to start? First, a shopping trip to IKEA for some quick fixes. We'll go left to right in the pictures below. 1) I located the four prints I gave her for Christmas. They were in nice bright IKEA frames already and were artsy photographs she had taken herself. We dusted them off and hung them. 2) We replaced the old-fashioned standing mirror with the simple MINDE mirror for cheapie-cheap. 3) I started printing photos to frame her closet, kind of a reversed picture frame with all the photos along the outside. I chose photos from the last 12 months and mixed the sizes, 4x6, 5x5 and 5x7. I also picked up a couple packs of printed cards to mix it up a little and give it some variety. I used heavy duty glue dots to attach these all the way around the door frame.
  4) This great little picture mobile was only about $7 and holds 10 images. It was a cinch to put together and I love how it moves. 5) Added the LACK shelf to hold even more pictures, a few figurines and her nerd glasses. 6) A comfy padded butterfly chair from Sears to sit and read in.
 We topped all this off with the fabric covered stretcher frame and some old records. This girl LOVES music almost as much as she loves reading. I married the two and put quotes from Edward and Jacob in the middle of each record. The black vinyl helped tie in the fabric and the new chair. Her brother also got her this fun paper star lamp to hang over her bed. It is even more delicious at night AND we found it at a great shop in Highland called Anna & Rose that you must go check out. It's run by a dear friend of mine and is simply fantastic.
Wednesday, September 30, 2009
Easy Wall Art!
Today is my daughter's birthday, my step-daughter that is. I don't think I've really broken down our family for you. I'll save that for tomorrow though. Today I have a great little project I whipped up as part of her birthday present. Since she gave us no help at all per wish list we decided to dress up her room a bit. She's a lot like me when it comes to decorating a place ... she doesn't do it. Our two bedrooms are the only rooms in the house that don't have anything on the walls to warm it up. I can actually hear a slight echo in mine every time I cough. Sad. Anyway, we found some quick fixes in the IKEA catalog and finished everything in less than 24 hours. My favorite part was the stretch frame.
They sell these at IKEA for $4.99, but they're very popular and hard to find in stock here. Luckily, they had one returned the same day I hit the store. I grabbed it and made a beeline for their fabric bolts. The one I wanted was black, white and green and out of stock. Grrr. So I took my second choice, black and white only, and had a great idea along the way.
The actual frame assembly was really simple, took less than 10 minutes and is about 20" square. After that I pinpointed the design area I wanted and cut my fabric to size, 26" square. Then I was the uber-nerd and colored in a photograph of the piece to plan where I wanted each color. (there just wasn't time/room for a flub up) Attaching the fabric was a breeze too. I just grabbed one of hubby's utility staplers and some 1/4" staples. First center the frame face down on the wrong side of the fabric. Now starting in the middle of each side, pull the fabric taught, pull up and around the frame and drive in one staple. Then, work your way down each side stapling every inch or so. Leave 2" at the end of each side so the corners are free as shown.
 For the corners, trim away a modest square to get rid of some bulk. Then tuck and fold to get a nice clean corner. This isn't an exact science; just keep it neat and clean and if you need to take out a staple to fix a mistake, by all means do it. It just takes a little patience, just a smidge. ;)
 OK. So far we've just followed IKEA directions. Now, for the fun part. I had to make this piece actually blend in with her bedding and wall colors, lots of lime green and different shades of blue, so I decided to treat it like a paint-by-numbers sort of project. I have gads of acrylic paint in my craft supplies, which can admittedly get a bit crispy on fabric unless you know a trick or two.
They sell these at IKEA for $4.99, but they're very popular and hard to find in stock here. Luckily, they had one returned the same day I hit the store. I grabbed it and made a beeline for their fabric bolts. The one I wanted was black, white and green and out of stock. Grrr. So I took my second choice, black and white only, and had a great idea along the way.
The actual frame assembly was really simple, took less than 10 minutes and is about 20" square. After that I pinpointed the design area I wanted and cut my fabric to size, 26" square. Then I was the uber-nerd and colored in a photograph of the piece to plan where I wanted each color. (there just wasn't time/room for a flub up)
 Attaching the fabric was a breeze too. I just grabbed one of hubby's utility staplers and some 1/4" staples. First center the frame face down on the wrong side of the fabric. Now starting in the middle of each side, pull the fabric taught, pull up and around the frame and drive in one staple. Then, work your way down each side stapling every inch or so. Leave 2" at the end of each side so the corners are free as shown.
 For the corners, trim away a modest square to get rid of some bulk. Then tuck and fold to get a nice clean corner. This isn't an exact science; just keep it neat and clean and if you need to take out a staple to fix a mistake, by all means do it. It just takes a little patience, just a smidge. ;)
 OK. So far we've just followed IKEA directions. Now, for the fun part. I had to make this piece actually blend in with her bedding and wall colors, lots of lime green and different shades of blue, so I decided to treat it like a paint-by-numbers sort of project. I have gads of acrylic paint in my craft supplies, which can admittedly get a bit crispy on fabric unless you know a trick or two.
 If you mix it with a Textile Medium, it will "transform the acrylics into a washable fabric paint". You can find this in most craft stores and it's reasonably priced. (I also had this on hand - scary how many supplies I possess, very scary) I chose a nice bright green, a turquoise and a darker shade of blue, all perfect for her bedroom. Just mix a dab of the textile medium into your paint and then choose a nice firm paintbrush of appropriate width for the area you're painting, mine were all very skinny. Then go to town. I tried to be careful about staying in the lines, but ... no one's going to go and study it up close where I hung it. ;) Here's the finished piece and another picture of it in its new home. More pictures of the bedroom facelift coming soon.

 Here's the finished piece and another picture of it in its new home. More pictures of the bedroom facelift coming soon.

Saturday, September 19, 2009
Business Cards: Managed
I have this bad habit of collecting business cards when I go to different shows and boutiques. Yes, I'm one of those people. I have little piles of them stashed all over the place. It makes it really inconvenient when I need to find someone specific. So! I cleaned them out today. I sifted through them and threw out any that I wouldn't need. The lucky ones I had left have been put into this nifty little ring. It was easy-peasy and only took about 10 minutes. I lined them up and punched holes in the upper left corner. Cut a piece of chipboard slightly bigger than the cards for the covers, mod podged some pretty paper on the outsides and a plain green cardstock on the insides ... then just put them all in the binder ring. Voila! Anyone can do this quickie project.
 I lined them up and punched holes in the upper left corner. Cut a piece of chipboard slightly bigger than the cards for the covers, mod podged some pretty paper on the outsides and a plain green cardstock on the insides ... then just put them all in the binder ring. Voila! Anyone can do this quickie project.
Thursday, September 10, 2009
De-stash Craft
It's that time. The kids are in school. There are quiet moments to be found between laundry and work. The crafty goddess (ha!) in me is dying to come out. It's time to do some crafty de-stashing. First up is a new batch of classy glass, magnets to be more specific.
You'll need:
jumbo flat glass gems
Mod Podge
fine glitter
rub on decals of choice
something to cut fun text from
x-acto knife
glass and ceramic paint
appropriately sized paint brushes
magnets
glue of choice
1) Wash the glass marbles/gems in hot soapy water and dry thoroughly. We need to get all the dust, grease and schmutz off of them so our pretties will all stick properly. Choose a set of 3 or 4 that are about the same size that do not have big flaws. 2) Decide which decals you want to apply. Cut them to the appropriate size hold in place on the flat side of the glass gem, sticky side down. Use your applicator tool to transfer the decal to the gem. Be sure to go over all areas of the decal before you move on.
 3) Use your x-acto knife to carefully cut around the text you'd like to use. I cut a jagged line on all four sides of the word or phrase and then push along the cut with the blade to tear the piece out. Once you've decided where to place it on your gem, spread a smooth, thin layer of Mod Podge to the side of the paper that will be visible. Carefully adhere it to the glass and press down firmly on all parts of the paper.
 4) Spread a thin, even layer of Mod Podge over the flat area of the gem. This is to seal the text and decal and will also hold your glitter. Sprinkle glitter where you'd like it and allow the whole piece to dry thoroughly. You can also use clear fingernail polish for this step.
 5) Shake your paint bottle to mix it well, then apply a generous layer of paint to the entire flat area of the gem. If you get streaks, your paint is probably too old. Don't worry, just let it dry and then paint on a second coat. Let the paint dry until it is no longer tacky.
 6) Using your glue of choice, attach the magnets. Ta-da! These are quick to make and gorgeous to boot! What great little gifts for friends, neighbors, teachers ... just about anyone!
 There are more, but you'll have to check my Etsy store in the next couple of days to see them!
You'll need:
jumbo flat glass gems

Mod Podge
fine glitter
rub on decals of choice
something to cut fun text from
x-acto knife
glass and ceramic paint
appropriately sized paint brushes
magnets
glue of choice
1) Wash the glass marbles/gems in hot soapy water and dry thoroughly. We need to get all the dust, grease and schmutz off of them so our pretties will all stick properly. Choose a set of 3 or 4 that are about the same size that do not have big flaws.
 2) Decide which decals you want to apply. Cut them to the appropriate size hold in place on the flat side of the glass gem, sticky side down. Use your applicator tool to transfer the decal to the gem. Be sure to go over all areas of the decal before you move on.
 3) Use your x-acto knife to carefully cut around the text you'd like to use. I cut a jagged line on all four sides of the word or phrase and then push along the cut with the blade to tear the piece out. Once you've decided where to place it on your gem, spread a smooth, thin layer of Mod Podge to the side of the paper that will be visible. Carefully adhere it to the glass and press down firmly on all parts of the paper.
 4) Spread a thin, even layer of Mod Podge over the flat area of the gem. This is to seal the text and decal and will also hold your glitter. Sprinkle glitter where you'd like it and allow the whole piece to dry thoroughly. You can also use clear fingernail polish for this step.
 5) Shake your paint bottle to mix it well, then apply a generous layer of paint to the entire flat area of the gem. If you get streaks, your paint is probably too old. Don't worry, just let it dry and then paint on a second coat. Let the paint dry until it is no longer tacky.
 6) Using your glue of choice, attach the magnets. Ta-da! These are quick to make and gorgeous to boot! What great little gifts for friends, neighbors, teachers ... just about anyone!
 There are more, but you'll have to check my Etsy store in the next couple of days to see them!
Tuesday, September 8, 2009
FINALLY! Sprouts With Attitude ...
I am feeling so, so proud of my sweet hubby and all his sweet skills. Now, you should understand that when we bought our house the yards, front and back, were hideous. It was like someone had xeriscaped in the dark with a bunch of sample materials they'd collected from shops up and down the valley. OK, that was mean and beside the point.
Today it is official. After months of digging up and raking out rocks, after moving loads and loads of dirt around and hauling out buckets of bark ... after seeding, spreading peat moss and adjusting the sprinklers ever so carefully, our back yard is now absolutely more green than brown. I LOVE MY HUSBAND! They have a long way to go, but these little sprouts are so cute and definitely have a lot of spunk.
Today it is official. After months of digging up and raking out rocks, after moving loads and loads of dirt around and hauling out buckets of bark ... after seeding, spreading peat moss and adjusting the sprinklers ever so carefully, our back yard is now absolutely more green than brown. I LOVE MY HUSBAND!
 They have a long way to go, but these little sprouts are so cute and definitely have a lot of spunk.
Friday, August 21, 2009
Picnik Anyone?
If you haven't found Picnik.com yet then I have a real treat for you. It's a great free-ish online photo editing playground. You get access to a handful of fun tools for free and loads more if you buy the upgrade for an almost free price. I've been editing the photos from my trip and thought I would have some fun with some of them.
 #1 is Lomo-ish (effects), #2 is with the HSL Filter (sandbox), #3 is using Hypnotic (sandbox) and #4 shows you Neon (effects). I love them all! And each effect/filter has custom tools for adjusting each picture to your exact liking. Change the brightness, hue, bloom, saturation, you name it. Play and finesse to your little heart's content then save and share. Voila!
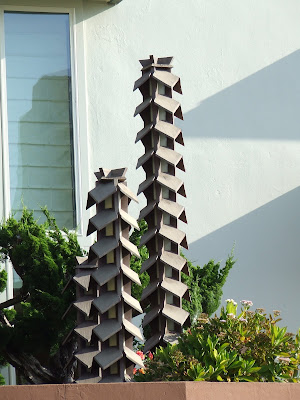
This little treasure was one of the great porch decorations on Lombard. I love the repetition and the angles and am dying to know if it lights up at night. Anywho it was a great piece for my little illustration here. This is the original. I just uploaded and cropped it in the Edit tab and then used some of my favorite effects from the Create tab.
#1 is Lomo-ish (effects), #2 is with the HSL Filter (sandbox), #3 is using Hypnotic (sandbox) and #4 shows you Neon (effects). I love them all! And each effect/filter has custom tools for adjusting each picture to your exact liking. Change the brightness, hue, bloom, saturation, you name it. Play and finesse to your little heart's content then save and share. Voila!
Subscribe to:
Posts (Atom)


 Posts
Posts

